I’ve probably said this countless times, that Firebase is one of the most exciting announcements for me at this year’s I/O and I’m yet to fully explore it. Recently, I tried out the crash reporting and it was smooth. Check out this post to catch up on that.
Another really interesting part of Firebase is Remote config. Remote config allows you update your app without necessarily deploying a new version of your app. The biggest challenge as app developers is getting your users to update their apps. Firebase remote config seems to solve the problem of configuring and updating your app without having to redeploy an update of your app.
I first observed this behaviour on Twitter’s Android app. The app changes right there even when you’re on it without you updating.
My twitter app just changed without updating 😳
— SF (@segunfamisa) February 13, 2016
In this post, I would show how you can use Firebase’s remote config feature to achieve this behaviour.
Why should I use remote config?
The major benefit of remote config is delivering the right experience to your users, the right users as fast as possible. Adapting to user feedback is very important to the success of your app. Testing out new features is equally important. There is where remote config comes in handy.
You can change the look and feel of your app remotely with remote config, allowing you to run experiments all geared towards providing a premium experience for your app.
For example, you want to determine how well a green button attracts users to click, compared to how a black button does. Remote config is your go to.
You want to run a campaign for Christmas, so you want your app to have that Green, White and Red feel, you should not have to redeploy a new app solely for that purpose, and even if you do, what’s the guarantee that half of your users will update their app? Remote config has to be your buddy.
Remote config is superb for A/B testing.
TL;DR, remote config allows you:
- Modify your app without a new production deployment
- Customize content for different Firebase Analytics audiences and measure results
- Roll out features gradually and monitor the impact
How to use?
1. Setup Firebase
First thing to do is to setup Firebase. This step is very much similar as covered in the Firebase Crash Reporting. Please check here for how to setup Firebase.
2. Add Remote config
Next step is to add the Firebase Remote Config Library to your app. This is done by adding this line to
your app-module’s build.gradle file.
compile 'com.google.firebase:firebase-config:9.0.0'
At the end of this step, your build.gradle file should look like this:
apply plugin: 'com.android.application'

android {
  // ...
}

dependencies {
  // ...
  //remote config library
  compile 'com.google.firebase:firebase-config:9.0.0'
}

// ADD THIS AT THE BOTTOM
apply plugin: 'com.google.gms.google-services'
3. Implementing Remote Config
To implement remote config, we need to setup the parameters we wish to configure as well as build our app to fetch and use these parameters.
Setting up the parameter values on the server.
Add parameters
An important step in using remote config is setting up the parameters we wish to configure on the server.
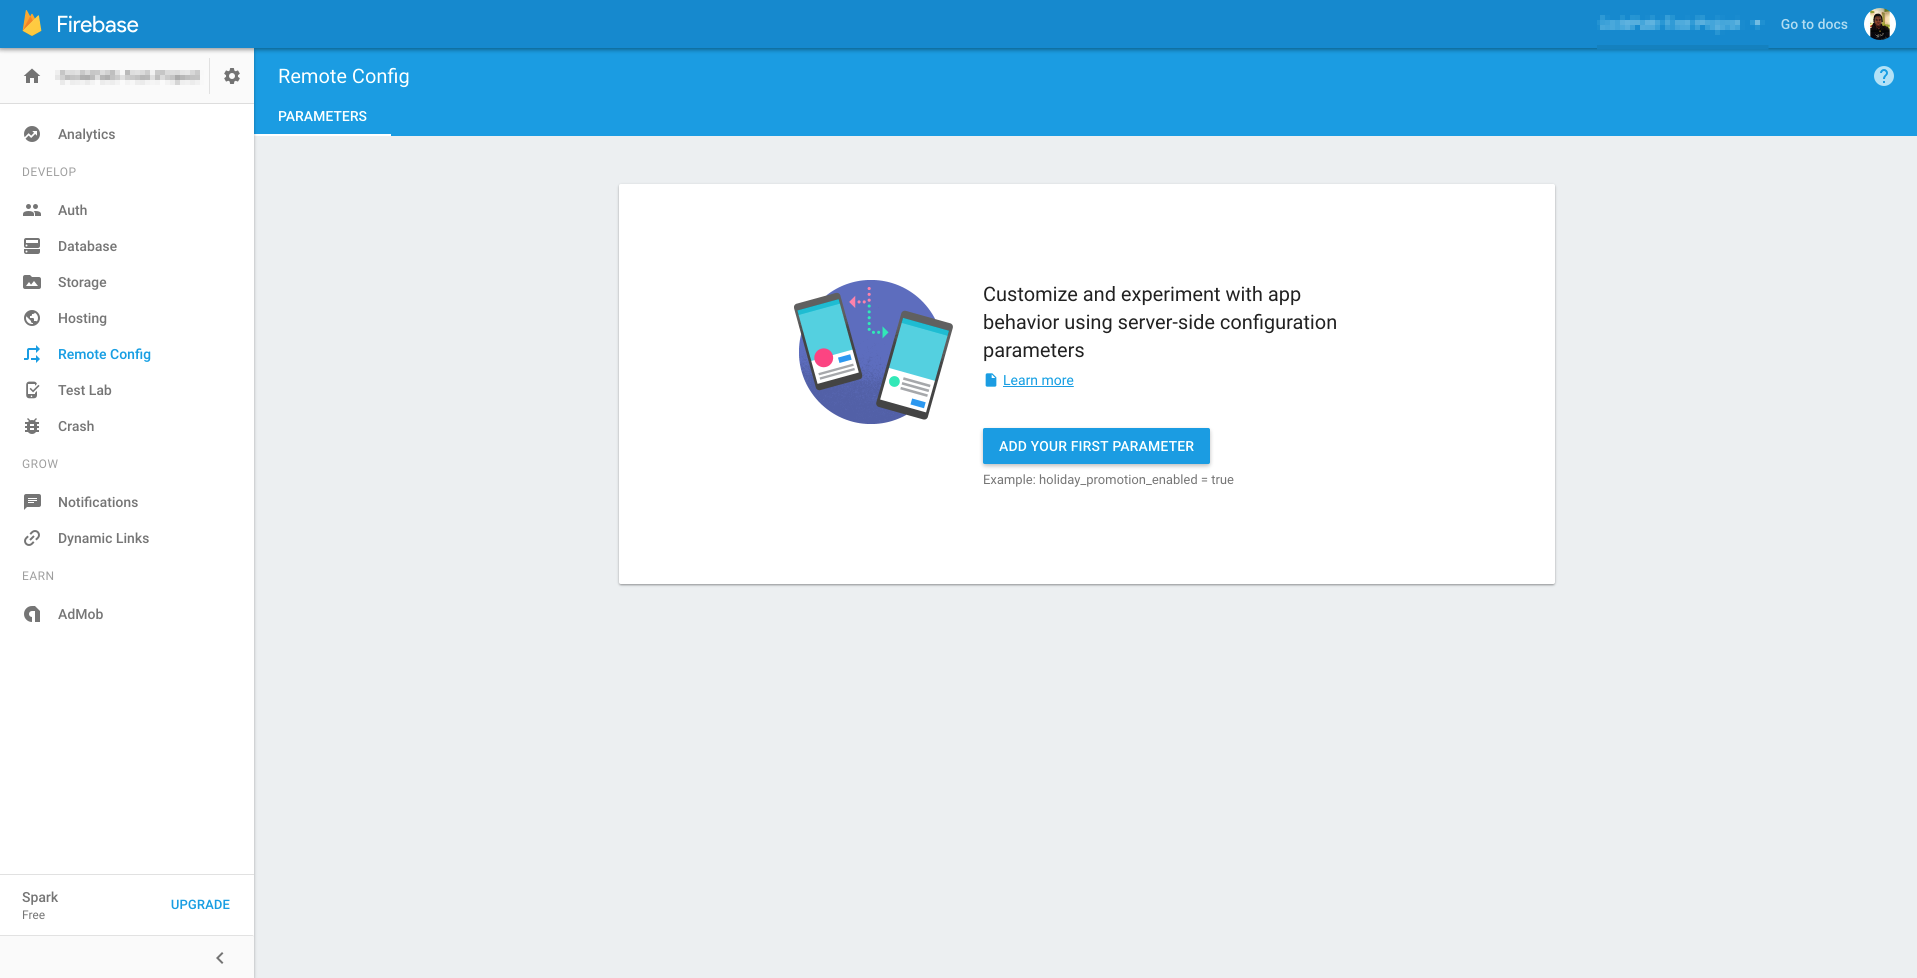
To do this, we need to navigate to the Remote Config page from the left pane of the console dashboard. It should look like this:
Next is to actually determine what values you want to remotely configure. It could range from theme colors, to messages and texts and discounts or whatsoever.
Please note that these policies exist concerning the kind of information you should put:
- Don’t use Remote Config to make app updates that should require a user’s authorization. This could cause your app to be perceived as untrustworthy.
- Don’t store confidential data in Remote Config parameter keys or parameter values. It is possible to decode any parameter keys or values stored in the Remote Config settings for your project.
- Don’t attempt to circumvent the requirements of your app’s target platform using Remote Config.
Once that’s done, we just need to click on ADD YOUR FIRST PARAMETER as seen above.
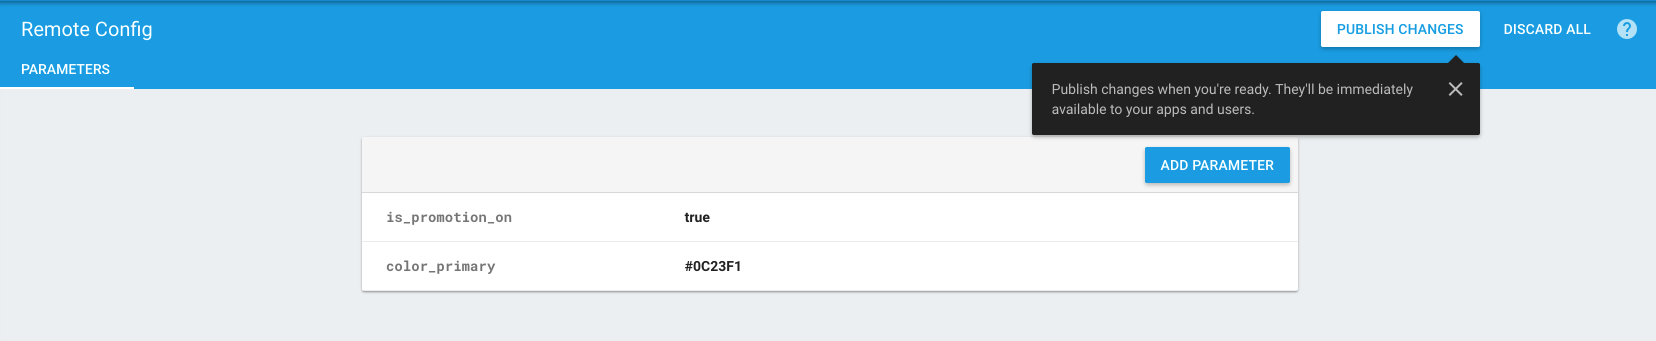
Be sure to click publish changes when you’re done adding parameters. At the end of this step, you should have a dashboard that looks like this.
Add conditions
After adding your first parameter, you can now add conditions. Adding conditions allow you to apply different server parameter values based on various conditions such as Country, AppId, OS Version, random percentile of users, App version etc.
Adding conditions is easy:
You can also remove or modify your conditions by navigating to the conditions tab
After adding conditions, you can now specify the values to return if the conditions specified checks as true.
When you apply conditions to some values, your dashboard would look like this:
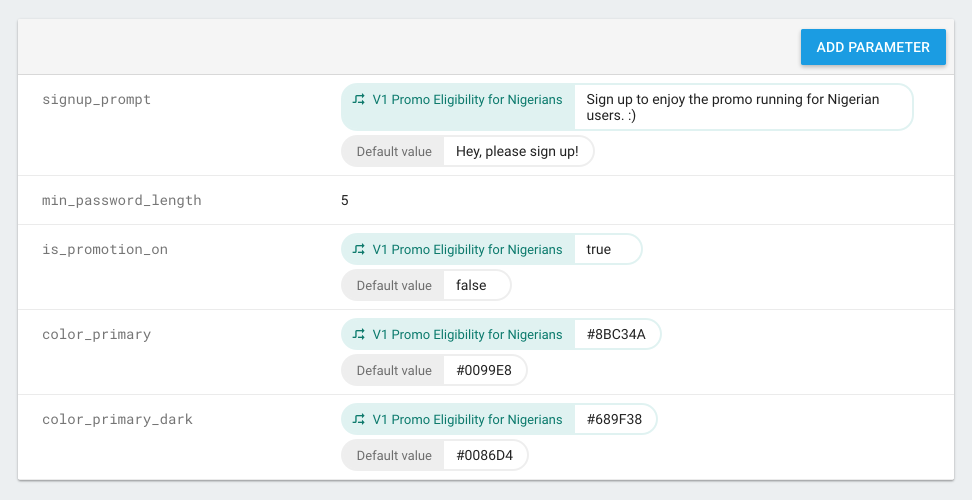
You should note that there’s a limit of 2000 parameters and up to 100 conditions and parameter keys can be 256 characters long.
Implement remote config on your app.
To use the remote config library on your app, you need to get a remote config object that will be used to cache your local values and get remote values as well.
To do this, you will be doing something like this:
mRemoteConfig = FirebaseRemoteConfig.getInstance();
FirebaseRemoteConfigSettings remoteConfigSettings = new FirebaseRemoteConfigSettings.Builder()
        .setDeveloperModeEnabled(true)
        .build();
mRemoteConfig.setConfigSettings(remoteConfigSettings);
We basically retrieved an instance of the FirebaseRemoteConfig object and we enable the developer mode so that the cache gets refreshed often.
Next is, to set the in-app default values of the parameters we wish to configure remotely.
We can do this using the mRemoteConfig.setDefaults() method. This typically takes in an xml resource
or a Map. For example:
mRemoteConfig.setDefaults(R.xml.remote_config_defaults);
What’s up with the XML defaults file.
The XML defaults file is just a description of the key and the default value of the parameters you wish to configure remotely. Within your app-module’s ../res directory, you need to create an xml directory.
It is within this directory that the file should be placed. Note that the keys have to be
the same as you used on the Firebase Console.
A typical file looks like this:
<?xml version="1.0" encoding="utf-8"?>
<defaultsMap>
    <entry>
        <key>signup_prompt</key>
        <value>You idiot. Don't be stupid. Sign up!</value>
    </entry>
    <entry>
        <key>min_password_length</key>
        <value>5</value>
    </entry>
    <entry>
        <key>is_promotion_on</key>
        <value>false</value>
    </entry>

    <!-- color entries -->
    <entry>
        <key>color_primary</key>
        <value>#3F51B5</value>
    </entry>
    <entry>
        <key>color_primary_dark</key>
        <value>#303F9F</value>
    </entry>
</defaultsMap>
This is basically entries of keys and values for the default files. The values are retrieved as either Long, double, boolean, or String.
This is also possible through code. You can build the default values as a Map with Strings as keys and the respective objects (Long, double, boolean, String, int) as values. For example:
HashMap<String, Object> defaults = new HashMap<>();
defaults.put("signup_prompt", getString(R.string.config_signup_prompt));
defaults.put("min_password_length", res.getInteger(R.integer.config_min_password_len));
defaults.put("is_promotion_on", res.getBoolean(R.bool.config_promo_on));
defaults.put("color_primary", getString(R.string.config_color_pry));
defaults.put("color_primary_dark", getString(R.string.config_color_pry_dark));

mRemoteConfig.setDefaults(defaults);
Fetch remote values.
Now that we’ve set default values, we need to fetch the remote values and activate them.
This block of code does that:
// cache expiration in seconds
long cacheExpiration = 3600;

//expire the cache immediately for development mode.
if (mRemoteConfig.getInfo().getConfigSettings().isDeveloperModeEnabled()) {
    cacheExpiration = 0;
}

// fetch
mRemoteConfig.fetch(cacheExpiration)
        .addOnCompleteListener(this, new OnCompleteListener<Void>() {
            @Override
            public void onComplete(Task<Void> task) {
                if (task.isSuccessful()) {
                    // task successful. Activate the fetched data
                    mRemoteConfig.activateFetched();

                    //update views?
                    updateViews();
                } else {
                    //task failed
                }
            }
        });
What we’ve done here is, fetch the latest remote config values and to do that, we first set the cache to 12hours and 0 if developer mode is enabled. If the values in the cache are older than the desired cache expiration, Remote Config will request fresh config values from the server. Setting the cache expiration to 0 for developer mode enables easy debugging.
Note that on successful fetch task, we call mRemoteConfig.activateFetched(). This is important
because the values fetched are only cached and not activated without that.
Use fetched values.
Now that we’ve fetched the values, we need to use them. We need to retrieve the values from the FirebaseRemoteConfig object using the same keys specified. For example, to set the toolbar color when our promo is on, we do something like:
// check whether promo is on
boolean isPromoOn = mRemoteConfig.getBoolean(CONFIG_IS_PROMO_ON);

// use remote value if promo is on, otherwise, use the default config value.
int color = isPromoOn ? Color.parseColor(mRemoteConfig.getString(CONFIG_COLOR_PRY)) :
        ContextCompat.getColor(this, R.color.colorPrimary);

toolbar.setBackgroundColor(color);
We also want to show a “Signup coupon code” field if our promo is running. We do something like:
boolean isPromoOn = mRemoteConfig.getBoolean(CONFIG_IS_PROMO_ON);
mEditPromoCode.setVisibility(isPromoOn ? View.VISIBLE : View.GONE);
More?
If you want to see more code, please checkout this sample on Github.
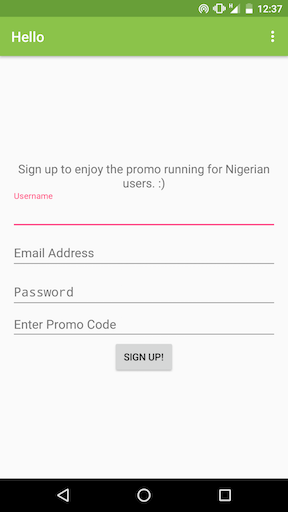
In the app, we have a signup screen with the sign up message configurable remotely because we plan to change the sign up prompt depending on whether we’re having a promo or not.
The demo app looks like this:
Be sure you checkout the firebase-remote-config branch.
There is more to do with Firebase remote config . There’s a whole section on how to use it with Firebase Analytics to achieve good A/B testing and experiments. Please check here for more.
References and further reading
- https://firebase.googleblog.com/2016/06/introducing-firebase-remote-config.html
- https://firebase.google.com/docs/remote-config/android
- https://firebase.google.com/docs/reference/android/com/google/firebase/remoteconfig/package-summary
- https://firebase.google.com/docs/remote-config/config-analytics
If you found this post useful, kindly share. Comments, corrections and questions are welcome.
You can now set that AppConstants file free :)
Cheers.